Saturday, 13 February 2016

Making the trestles to support the Mini

A bit of a lazy day today (another gloomy and cold weekend) as I only managed to make the wooden trestles. The mini will sit on these whilst it is being stripped of the remaining 'removable' bits, and for the clean-up operation.

The trestles are made from recycled wood (rafters from a demolished bungalow) - I'll let the photos do the talking:


Here's one of the finished trestles and another one ready for assembly.


Then the 6-inch nails and some reclaimed shorter nails.

Pre-imbedding the 6-inch nails.

Measure twice and 'nail' once.

One side nailed.

All legs nailed in.


Trestle now standing up but needs more nails to keep the legs in place. I've weighed it down to make sure the legs are flat on the ground with no wobble.

All done (just needs a lick of paint).

Saturday, 6 February 2016

Three-and-a-half-year Hiatus...

This photo was taken in June 2012. So, what has happened since then?

I can only work on the car on weekends, and sometimes in the evenings during summer months, and the past three years or so I, with the occasional assistance of my co-project owner, managed to strip the car bare - everything that can be taken off, with the objective of having a bare shell. First to go are the tyre and wheels, engine and transmission, front subframe, bits inside the car, some loose bits outside the car, and the boot lid. The car has then sat on jack stands.

I also managed to construct an mini-overhead crane - the crane came from a defunct kiln that I sourced from Freecycle and the wood frame is made from roof trusses from a torn-down bungalow, also sourced from Freecycle.

Downtime is spent sourcing bits (windscreens, window glass, etc. etc.) on eBay, Gumtree, mini forums (e.g. The Mini Forum), the local mini enthusiast's club (e.g. Chichester Mini Club). Budget is a bit tight, so we are being creative with what we need to spend on.


Wheels and tyres off.

Engine, transmission, and front subframe off.


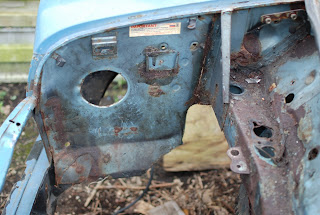
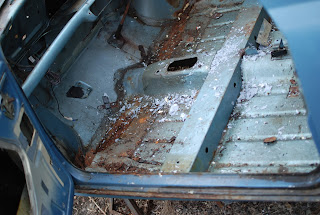
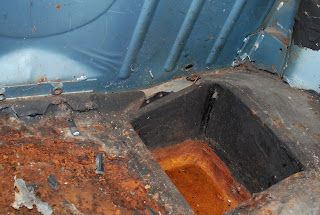
Floor needs a bit of welding :(

Floor in very sad state.


More welding needed.


Definitely a hole in the corner.


Headlining still needs to be taken off.

Rear subframe still in place.

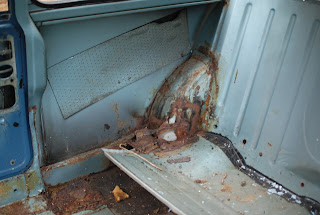
Look at the state of that previous bad repair :(

Petrol tank has been taken out.


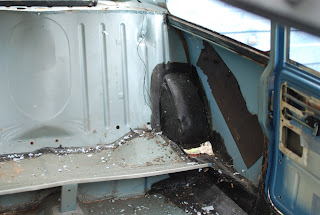
Boot floor is definitely knackered.


This also needs to be replaced.


This is my DIY mobile crane, with the shell lifted up and ready for loading. My neighbour wanted his space back so we have to relocate the mini. There is no power nor water in the garage area so we needed to move the mini anyway. My boat trailer came in handy for carrying the mini shell. The bare shell weighs only about 140 kg (about 200 kg with subframes), so I reckon the shell with the rear subframe is about 160 kg which means I will only have to lift about 60 kg if I position the trailer wheel in the centre of gravity.

Mini shell 'hanged'.


Trailer in place.


Mini shell ready to be strapped into the trailer and moved.

This is the engine, front subframe, and the transmission loaded in my (also) DIY heavy duty hand truck. The hand truck wheels are vintage and made of solid metal with hard solid rubber tyres (bought in the car boot sale for about a couple of quids), the frame, again, from wooden roof trusses, and the platform and push arm from an old manual treadmill.

The engine assembly weighed shy of 140 kg or so and I somehow managed to move this, manually, for a hundred yards or so without busting my gonads.


Theory proved and I was able to easily move the mini shell on the boat trailer from my garage to the side of my house (though I did look like a Chinaman hauling a rickshaw).

Here it is covered up and strapped - there is a storm coming on the weekend #StormImogen - making sure this does not get blown away ;)